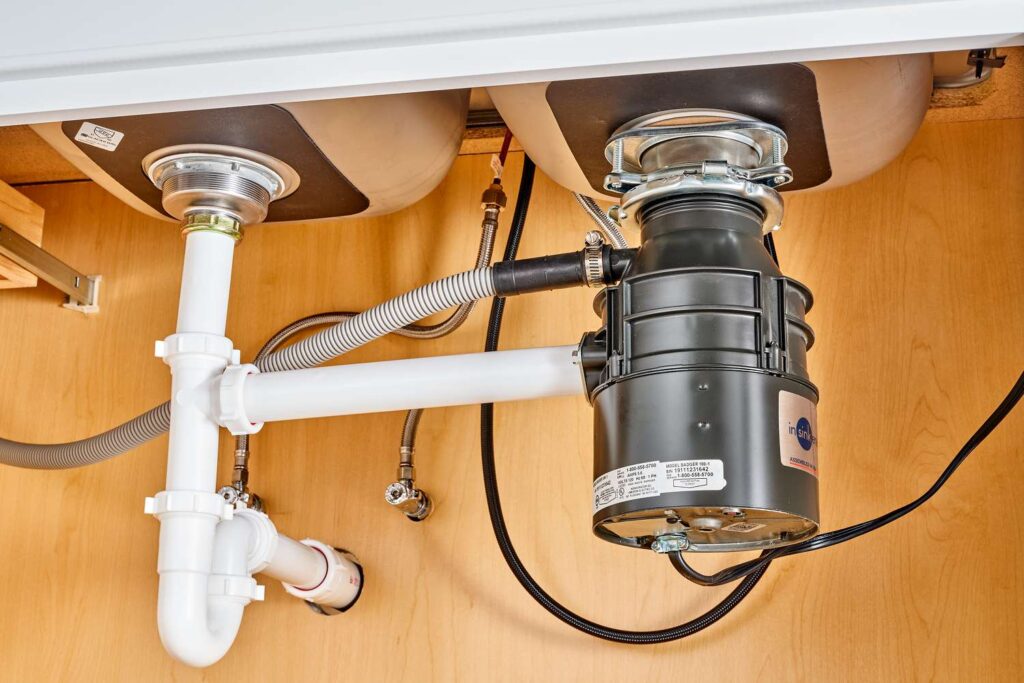
Installing a garbage disposal can make kitchen cleanup easier. This guide will show you how to install one yourself. Follow these steps to get the job done.

Credit: www.youtube.com
Tools and Materials Needed
You will need some tools and materials before you start. Here is a list:
- Garbage disposal unit
- Screwdriver
- Plumber’s putty
- Wrench
- Bucket
- Plumbing tape
- Electrical wire connectors
Step 1: Turn Off Power
First, turn off the power to your kitchen. Find the circuit breaker and switch it off. This will keep you safe while you work.
Step 2: Remove the Old Sink Strainer
Next, you need to remove the old sink strainer. Use a screwdriver to loosen the screws. Carefully lift the strainer out of the sink. You might need to use a wrench to help loosen it.
Step 3: Clean the Sink Hole
Clean the sink hole where the strainer was. Remove any old plumber’s putty. Make sure the area is clean and dry before moving on.
Step 4: Apply Plumber’s Putty
Take a small amount of plumber’s putty. Roll it into a snake-like shape. Place it around the edge of the sink hole. This will help create a seal.
/garbage-disposal-installation-1824830-08-4a2a7bd4007f4f36a7a5392a58b07b6e.jpg)
Credit: www.thespruce.com
Step 5: Install the Mounting Ring
Now, install the mounting ring. Place it on top of the plumber’s putty. Press down firmly. Attach the mounting assembly underneath the sink. Tighten the screws to secure it in place.
Step 6: Connect the Disposal Unit
It’s time to connect the disposal unit. Lift the unit and align it with the mounting ring. Turn it until it locks into place. You might need help holding the unit steady.
Step 7: Connect the Plumbing
Next, connect the plumbing. Attach the discharge tube to the disposal unit. Use a wrench to tighten the connections. Make sure everything is secure.
Step 8: Connect the Electrical Wires
Now, connect the electrical wires. Match the colors of the wires. Use wire connectors to secure them. Make sure the connections are tight.
Step 9: Test for Leaks
Before you finish, test for leaks. Turn on the water and check the connections. If you see any leaks, tighten the connections. Use plumbing tape if needed.
Step 10: Turn on the Power
Finally, turn on the power. Go back to the circuit breaker and switch it on. Test the disposal unit to make sure it works. Run water and turn on the unit. It should work smoothly.
Tips for Maintaining Your Garbage Disposal
Proper maintenance can keep your garbage disposal working well. Here are some tips:
- Run cold water while using the disposal.
- Avoid putting large or hard items in the disposal.
- Use ice cubes to clean the blades.
- Use a disposal cleaner to remove odors.
Common Problems and Solutions
Sometimes, problems can occur with your garbage disposal. Here are common issues and how to fix them:
| Problem | Solution |
|---|---|
| Disposal won’t turn on | Check the power connection and reset button. |
| Disposal is noisy | Remove any foreign objects from the unit. |
| Water is leaking | Tighten the connections and check for cracks. |
Frequently Asked Questions
How To Install Garbage Disposal?
Turn off power. Attach disposal to sink drain. Connect disposal to power supply and dishwasher if needed.
What Tools Are Needed For Installation?
You need pliers, screwdriver, plumber’s putty, and a wrench. A power drill may also be useful.
Can I Install Garbage Disposal Myself?
Yes, you can. Follow manufacturer instructions carefully. Ensure you have the necessary tools and safety precautions.
How Long Does Installation Take?
It usually takes 2-3 hours. Complexity and experience level may affect the installation time.
Conclusion
Installing a garbage disposal can be easy with the right tools. Follow these steps to install your own. Always remember to stay safe and turn off the power. Regular maintenance can keep your disposal working well. If you run into problems, use the solutions provided.
Thank you for reading this guide. We hope it helps you install your garbage disposal. Happy installing!

